5 Composite Decking Lighting Ideas
Our composite decking looks great in any setting, but you can really make your outdoor spaces shine with our decking
Products in Stock
Lowest Prices
Express Delivery
10-Year Warranty
Early April Sale. Up To 15% Off.
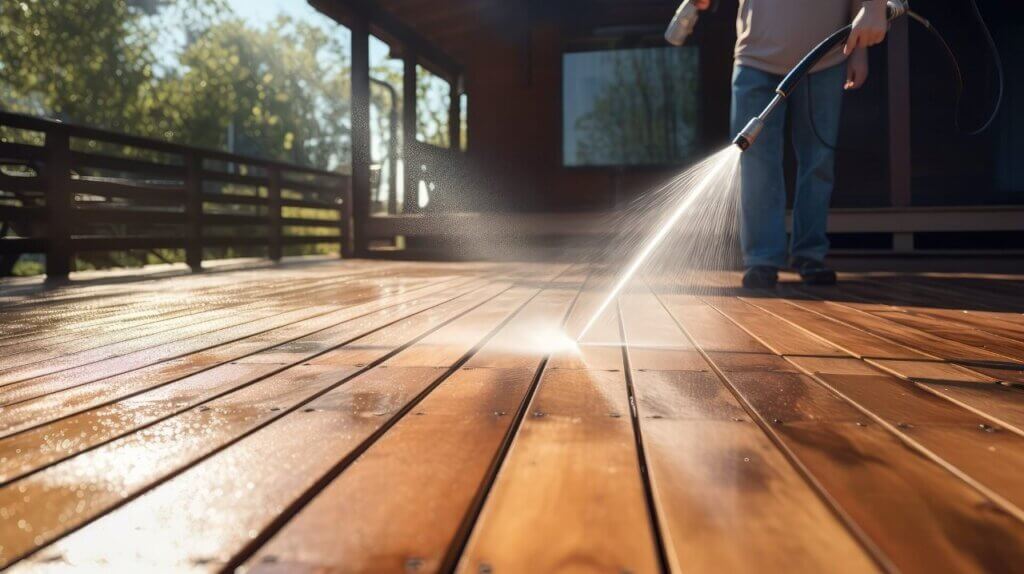
Noticed your deck looking a bit grim lately? It happens! After months of wet British weather, decks often end up with a cocktail of dirt, algae and mould that’s doing it no favours. A pressure washer can sort this right out – but blast away without knowing what you’re doing, and you might end up with more problems than you started with.
Let’s face it – our decks take a proper battering from the elements. Rain, scorching sun (on those rare summer days), fallen leaves, bird droppings… it all adds up. This isn’t just about making things look pretty, though. That green slime and black mould will eventually eat away at your wood, shortening your deck’s life and making it dangerously slippery when wet.
Most people don’t realise that regular cleaning actually saves money in the long run. A neglected deck might need replacing years before a well-maintained one. And if you’re fed up with the constant upkeep, composite decking offers an easy-to-maintain alternative to wood decking that won’t need nearly as much attention.
Before you start blasting away, taking a bit of time to prepare will save you headaches later.
This isn’t a case of ‘more power equals better cleaning’. For wooden decks, you want something around 1300-1600 PSI. Any stronger and you risk carving grooves into your deck boards or splintering the wood.
I’ve seen too many DIYers reach for industrial-strength washers and then wonder why their deck looks like it’s been attacked by a rabid badger. Electric models are usually perfect for home use – powerful enough to clean but not so beefy they’ll damage your wood.
You’ll need:
Clear everything off your deck – furniture, BBQ, plant pots, the lot. Give it a good sweep to get rid of leaves and loose dirt. Cover any electrical outlets with waterproof tape and throw some plastic sheeting over surrounding plants unless you fancy killing them with soap and dirt spray.
Got any wobbly boards or protruding nails? Sort them now. Pressure washing will only make existing damage worse.
Right, let’s get this deck cleaned up properly.
Connect your washer to water and power. For the nozzle, wider is better – a 40-60 degree spray pattern helps spread the force so you’re not concentrating all that pressure on one tiny spot.
Always test your settings first on an out-of-the-way bit of decking. If you’re gouging the wood, dial down the pressure or step further back.
For decks that look like they’ve been neglected since the London Olympics, a decent cleaner makes life easier. It breaks down the grime that’s been building up for months or years.
Slap it on according to the instructions (usually with a garden sprayer or brush), give it 10-15 minutes to work its magic, but don’t let it dry completely.
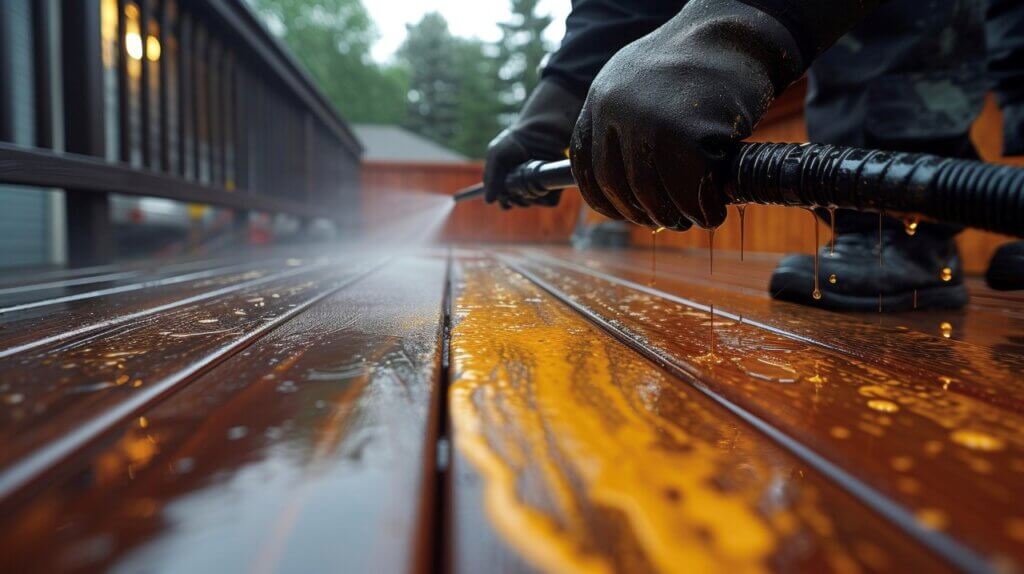
Keep the nozzle moving at all times and about 30cm from the surface. Always, always wash with the grain – go against it and you’ll raise the wood fibres, leaving your deck looking furry.
Work methodically in sections, using steady, overlapping strokes. Found a particularly stubborn stain? Another pass might shift it, but don’t be tempted to jam the nozzle right up close – that’s asking for trouble.
Once you’ve finished a section, rinse it thoroughly with clean water. After the whole deck is done, you’ll need to wait until it’s properly dry before moving on to staining or sealing. This usually takes 24-48 hours, depending on how typical the British weather is being.
Your deck’s clean – now what?
The golden rule: wait until it’s bone dry. This usually means 2-3 days of decent weather. Try to rush this step and you’ll end up with stain that peels or flakes off by next season.
Want to be sure? Pick up a moisture meter from any decent DIY shop. You’re aiming for 12-15% moisture content for best results.
Sealing is what keeps your deck looking good between cleans. It creates a barrier against water, UV damage and all the other stuff that weathers your wood. Our guide to sealing a deck walks you through choosing the right product and applying it properly.
Like staining, timing matters – the wood needs to be completely dry first. Skip the sealing step and you’ll find yourself pressure washing again much sooner than you’d like.
A pressure washer can work wonders on your deck, but it’s a bit like a chainsaw – incredibly useful when used correctly, potentially disastrous in the wrong hands. Take your time, use the right equipment, and don’t rush the drying time before refinishing.
Most deck disasters I’ve seen come from impatience or using too much pressure. Get these basics right, and you’ll have a deck that looks freshly laid rather than freshly savaged.
Remember that a yearly clean and seal is far cheaper than replacing damaged boards. And if your current deck is truly beyond hope? Maybe it’s time to consider those lower-maintenance options for the next go-round.
Our sample pack contains a sample piece of each colour currently available. Order your free sample pack today to compare the colours and get a true feeling of the Dino Decking range!
Our composite decking looks great in any setting, but you can really make your outdoor spaces shine with our decking
If the idea of having rats under your decking makes you shiver, don’t worry. We’ll let you know the signs
Business hours
Monday: 09:00 – 17:30
Tuesday: 09:00 – 17:30
Wednesday: 09:00 – 17:30
Thursday: 09:00 – 17:30
Friday: 09:00 – 17:30
Saturday: Closed
Sunday: Closed
Contact us
01942 355968
support@dino.co.uk
Collection Address: Unit 1 Wetheral Close Hindley Ind Estate Wigan Greater Manchester North West WN2 4HS
Pages
Products
Testing
Copyright 2025 Dino Decking Ltd All Rights Reserved.
VAT Number: GB296097848.
Company Number: 10837233.