5 Composite Decking Lighting Ideas
Our composite decking looks great in any setting, but you can really make your outdoor spaces shine with our decking
Products in Stock
Lowest Prices
Express Delivery
10-Year Warranty
Early April Sale. Up To 15% Off.

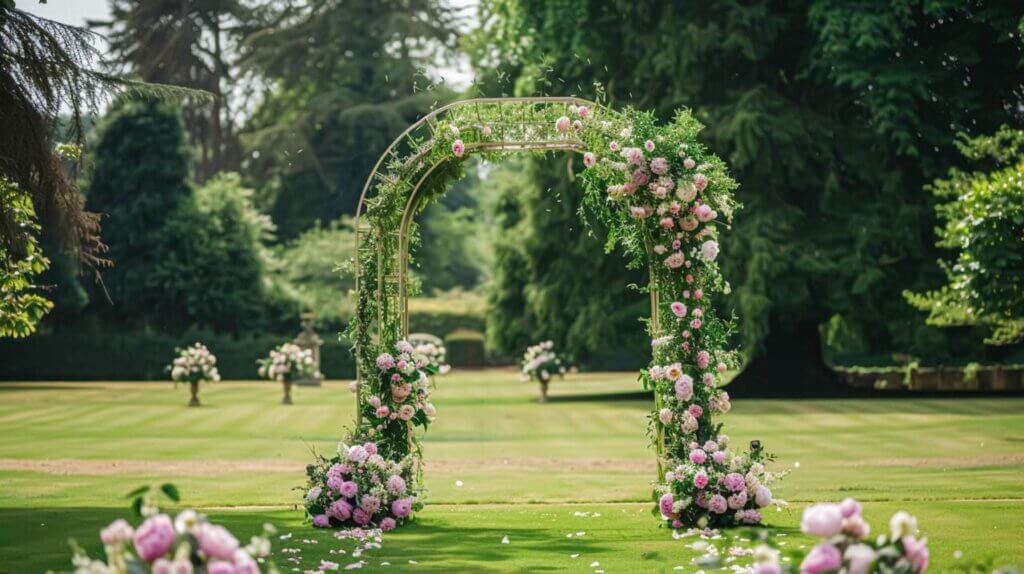
Fancy adding a bit of character to your garden? A trellis arch might be just the ticket. They’re not just for show, either – these arches can provide support for climbing plants, creating a beautiful, natural feature. Whether you’re a seasoned DIY enthusiast or a complete novice, building a trellis arch is a satisfying project – and if you’ve already read our guide to building a trellis, building an arch should be a piece of cake. Ready to get stuck in? Let’s take you through the process, step by step.
Right then, before you start, it’s essential to gather your materials. You’ll need:
Obviously, the backbone of your trellis arch. Timber is a classic choice but, between you and me, composite materials are the way to go. They last longer, require less maintenance, and are more environmentally friendly.
These will support the arch. Again, composite posts are a solid choice, but treated timber works too.
For securing the frame together. Stainless steel is best to prevent rusting.
If you’re setting the posts in the ground, you’ll need this to keep them steady.
You’ll need a saw (if cutting timber), a drill, a spirit level, a tape measure, and a shovel.
There are a few different designs you can go for. Choosing the right one depends on your garden’s layout and your personal taste.
This is your classic, standalone arch. It’s great for creating a focal point in the middle of your garden or marking the entrance to a different area. These arches are versatile and can be moved around if needed, although once the plants have settled in, you might not want to disturb them.
As the name suggests, this type of arch is attached to a wall. It’s perfect if you’re short on space or want to add some interest to a plain wall. They can create a lovely entrance to a patio or a cosy nook in your garden. These types of trellis will work better with a fence or wall.
You can also find trellis arches with added features like benches or gates. These are a bit more involved to build but can really transform your garden. Imagine a seating area under a canopy of fragrant roses – lovely, isn’t it?
Alright, let’s get down to the nitty-gritty. Here’s how to build your trellis arch:
First things first, decide where your arch will go and how big you want it. Sketch out a rough design, noting down the dimensions. Have a think about the style you’re after – something rustic, modern, or perhaps a bit whimsical?
If you’re using timber, you might need to cut it to size. If you’ve opted for a composite trellis for your garden, it might come ready to assemble, which saves a lot of faff. Ensure all your materials are ready to go before you start building.
Start by assembling the sides of your arch. Attach the trellis panels to the posts, making sure everything is level and square. Then, join the two sides together with crossbeams at the top to form the arch shape.
If your design includes extra panels for plant support (like lattice or mesh), add these now. You want to make sure they’re securely attached so they can handle the weight of your climbers as they grow.
If it’s a freestanding arch, you’ll need to dig holes for the posts. Once the arch is in position, fill the holes with concrete to keep it stable. For a wall-mounted arch, use suitable fixings to attach it securely to the wall.
Once the concrete has set, you can add any decorative touches. Maybe a lick of paint or some solar-powered fairy lights for a bit of evening sparkle. Now’s the time to plant your climbers, too.

A few extra pointers to help you along the way:
Consider how much sunlight the area gets throughout the day. Most climbing plants love a good dose of sunshine, so pick a spot that gets at least six hours of sunlight.
If you live in a particularly wet or windy area, make sure your materials can withstand the conditions. Composite materials are a good shout here as they’re designed to be durable and weather-resistant.
Clematis, honeysuckle, and climbing roses are all popular choices for trellis arches. They not only look beautiful but often smell divine, too.
Even the best of us make mistakes. Here are a few to watch out for:
Don’t skimp on materials. Cheap, flimsy wood or inadequate fixings won’t last, and you’ll end up having to rebuild the whole thing sooner than you’d like.
A wobbly arch is no good to anyone. Make sure those posts are firmly set in the ground, or that your wall fixings are strong enough to support the structure.
It’s tempting to go overboard with the greenery, but too many plants can put a strain on the arch. Be mindful of the weight and choose your plants wisely.
So there we have it. Building a trellis arch is a rewarding project that can add a real touch of magic to your garden. Take your time, enjoy the process, and soon enough you’ll have a stunning new feature to show off. Happy building!

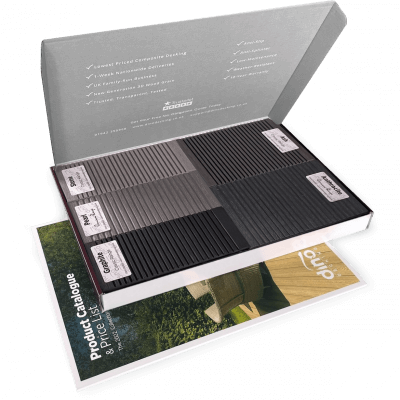
Our sample pack contains a sample piece of each colour currently available. Order your free sample pack today to compare the colours and get a true feeling of the Dino Decking range!
Our composite decking looks great in any setting, but you can really make your outdoor spaces shine with our decking
If the idea of having rats under your decking makes you shiver, don’t worry. We’ll let you know the signs
Business hours
Monday: 09:00 – 17:30
Tuesday: 09:00 – 17:30
Wednesday: 09:00 – 17:30
Thursday: 09:00 – 17:30
Friday: 09:00 – 17:30
Saturday: Closed
Sunday: Closed
Contact us
01942 355968
support@dino.co.uk
Collection Address: Unit 1 Wetheral Close Hindley Ind Estate Wigan Greater Manchester North West WN2 4HS
Pages
Products
Testing
Copyright 2025 Dino Decking Ltd All Rights Reserved.
VAT Number: GB296097848.
Company Number: 10837233.