5 Composite Decking Lighting Ideas
Our composite decking looks great in any setting, but you can really make your outdoor spaces shine with our decking
Products in Stock
Lowest Prices
Express Delivery
10-Year Warranty
Early April Sale. Up To 15% Off.
Temperatures have noticeably dropped, meaning there’s not long until we’re bringing out our puffy jackets, hats and scarfs. Not only do we need to get our wardrobes winter ready, but we also need to start preparing our gardens for the cold months ahead.
With autumn being the perfect season to tidy up borders, clean out your gutters and put measures into place to protect your plants, experts at Dino Decking have revealed what gardening jobs you should be doing now to prepare your garden for winter.
After a summer of making the most of your composite decking through hosting, catching some rays and eating alfresco, it will probably need some tender love and care before the harsh weather hits.
With heavy rainfall, strong winds and snowy conditions set to hit during winter, it’s important to prioritise decking maintenance to get your decking in the best condition possible to whether the weather!
To make sure your decking is pristine, durable and ready to combat harsh weather conditions, it’s essential to regularly inspect your decking. Check for signs of wear, damage and rotting, to help maintain your deckings longevity and performance. Tackling these issues quickly and efficiently can prevent them from worsening.
Not only is it important to give your home a good clean and tidy, but the same applies for your decking. Begin by removing any furniture, pots and plants so you can easily get to the decking and brush off any debris.
Once you have a clear canvas, use lukewarm water before scrubbing the surface with a soft-bristled brush. To finish up, rinse thoroughly with clean water or even a mop to speed up the process.
Even without rainfall, decking can provide the perfect environment for mould and mildew to build up. This is largely due to it being close to the ground where water and moisture can quickly soak into the wood – which is even more problematic when the rain comes.
Cracks between the floor boards can also become a breeding ground for mould, as it’s more difficult to get into the nooks and crannies and tackle the mould. Not only does this ruin your deckings aesthetic appeal, but mould can also cause sneezing, eye irritation and in some cases, breathing problems.
If you find mould on your decking, use a pressure washer to remove it or if you don’t have one, spray the deck with water. Once this is done, apply a decking cleaner solution to loosen any dirt and mould and scrub the problem areas. Next, thoroughly rinse with clean water and repeat until your decking is spick and span!
Whether it’s discolouration from the sun or staining from food and drink, tackling this should improve the overall look of your decking. Soap and water is the perfect remedy for discolouration, whilst scrubbing with a hot soapy sponge and specialised cleaner is ideal for stubborn stains.
Once you’ve cleaned your decking, it’s important to maintain and protect it from moisture, ice and snow throughout the colder months.
To prevent rotting and damage, apply deck sealer to stop water from permeating your decking. Sealing cracks can help prevent mould and fungus from growing, so it’s definitely not worth missing out on this step! However make sure to apply the sealant before any varnishes to protect it from damage, decay and rot.
It’s recommended to seal your deck once a year if you live somewhere with high rainfall, or 2-3 years if not.
Before you store your garden tools for winter, make sure to thoroughly clean them with a wire brush and a damp cloth. This will ensure your tools last longer and will be less likely to rust, whilst also preventing the spread of plant diseases, fungi and viruses. You may also want to sharpen the blades before you lock them up in the shed so when you need them next they’ll be in good condition to get started straight away.
When hanging your garden tools, store them vertically to make the most of your wall space and keep the floor clear and clutter free. Hanging also helps stop the tools from leaning against each other, which could damage them. On a practical note, hanging your tools vertically can also provide quick and easy access.
When it comes to protecting potted plants, you’ll want to provide enough insulation for the roots and stop soil from getting waterlogged. The best way to do this is by storing them inside a conservatory, shed or greenhouse to minimise damage.
If this isn’t possible, wrap outdoor plants in bubble wrap to insulate them. If you don’t have access to this, fill plastic bags with shredded paper or straw to provide similar results.
To store your lawnmower for winter, begin by giving it a thorough clean. Remove any grass, leaves and mud from the underside using a wire brush or putty knife. This will prevent key components from getting clogged. Once done, wash the exterior with clean water before thoroughly drying with a cloth to prevent rust.
If your mower is gas-powered, run the mower until the tank is empty, or drain the fuel to prevent it becoming stale. Some petrol lawnmowers won’t start after winter and this will prevent any issues with your lawnmower not starting. Alternatively, you may want to use a fuel stabiliser to prevent fuel from breaking down over winter.
To get your lawn mower ready for its next use, drain the old oil and replace it with some fresh oil. Keeping old oil can lead to damage to engine parts as it becomes thick and acidic.
If your mower is battery-powered, remove the battery to stop it corroding during the winter months. If you plan on keeping the battery, store this inside where it’s cool, dry and away from any extremely cold temperatures.
For storing the actual lawnmower, keep it indoors where it’s a dry and sheltered area to protect it from moisture and freezing weather conditions. However, make sure to disconnect the spark plug so your mower doesn’t accidentally turn on. If you don’t have indoor storage, use a weatherproof cover to shield from rain, snow and wind and aim to keep it off the ground to prevent rusting.
Not all furniture can be protected in the same way, which is why it’s important to know how to correct, clean and store your items.
For wooden furniture, begin by brushing away any large bits of debris and leaves before washing it down with warm, soapy water. Scrub away to get rid of any dirt and moss and then use a high quality furniture oil or colour protector to add a layer of protection.
To safeguard further, use durable and weatherproof covers to protect your furniture, using heavy-duty covers for larger items. If you have the space, store smaller furniture items inside your house or in a shed or garage.
For mesh garden furniture, use gentle washing up liquid or a mild cleaner and use a cloth to clean. Rinse off any excess soap and thoroughly dry before coating with car wax for protection.
Hoses can freeze in as little as 6 hours if the temperature drops below 0° and this can be very inconvenient if you’re wanting to use your garden hose there and then. Not only is it annoying, but a frozen hose can also cause it to split, weaken or even burst, meaning you’ll likely need a replacement.
To prevent freezing, disconnect from the water supply and hold it at one end. Lift it gradually to fully empty all the water. Next, inspect the hose for any wear and tear that may need replacement or patching up, before loosely coiling the house without any tight bends. If you’re coiling too tight, this will lead to cracks when the temperature drops.
If you don’t have space to store your hose in a shed or garage, you can protect it under any sheltered area to protect it from the frost. However, make sure that it’s stored off the ground to prevent it from freezing.
To protect your outdoor faucets from the cold weather, use an insulated cover to shield from the cold air and frost. This will help keep it in good condition throughout the winter.
Snow, ice and freezing can cause decorative items such as lights and wind chimes to crack, fade or rust.
Instead, store these decorative items inside, or cover with a weatherproof tarp to protect the glass or thin plastic from the cold.
If you want a battery that will hold its charge for a long time, then it’s important to keep any electronics inside. Phones and any battery-operated device are susceptible to component or screen damage from the moisture or cold, so it’s best to take in your valuables to ensure they work properly.
No matter the weather, your pets are going to still need their outside time. But, it may be worth bringing their pet bowls inside to prevent the plastic from cracking and freezing.
Instead, encourage your pets to eat and drink from their bowls inside so that they have fresh water.
Store your fertilisers, pesticides and herbicides in a cool, dry place to prevent them from freezing. Cold temperatures can lead to these chemicals losing their effectiveness or for containers to crack and leak everywhere.
If you’ve got children who love playing with toys outside, it’s advisable to store them in a shed or even in the house. This is largely due to them becoming brittle and cracking in the freezing weather.
So, if you don’t want your kids upset that their favourite toy is broken, you may want to give the toys a new (warmer) home.
If you’re thinking of retiring your bike for the winter, don’t leave it outside in the open. The metal parts of bicycles can rust, whilst the cold temperatures may cause rubber tires to crack. To combat, store bikes inside a garage or basement if you don’t plan on using them for the foreseeable. This will keep them in tip top shape and ready for your next adventure.
Other equipment such as tennis rackets and footballs can also worsen due to the cold and moisture. This could lead to your footballs deflating, bounce differently or make them harder to hold, so make sure to keep these inside as well.
Now we’re steering away from BBQ season, it’s worth storing your grill in a sheltered area to protect it from snow, ice and cold.
Unfortunately, you can’t leave your BBQ outside during winter as these weather conditions lead to rust and damage to the grills’ electric components. It’s worth also using a heavy-duty cover to give it that extra layer of protection from the harsh temperatures.
October marks the month where the temperature begins to drop and the grass growth starts to slow. This marks the perfect time to do your last mow of your grass before it really starts to feel like winter.
Ideally, the best time to stop cutting your grass is from the end of October to early November as after this, the tops will start becoming frosty. Frost stops grass growth so it’s worth putting your mower away until it’s needed in the new year.
Now, you don’t have to have messy looking grass for the rest of the year. A light high cut is possible at any time during winter to keep your grass looking in order. Make sure not to mow on frosty lawn or if frost is due within 24 hours of you mowing your grass.
To protect your lawn during winter, you can use the time in autumn to fertilise and nurture your grass so that it can withstand the harsh weather to come. Opt for either slow release or quick release fertiliser to strengthen grass roots and fight off winter diseases.
With temperatures getting colder, snow is probably on the cards for some point this year. Whilst many of us love going outside and making snowmen and having snowball fights, there are instances where you’ll want the snow to vanish.
If you’re wanting to remove snow from your patios and pathways, don’t just reach for the snow shovel! The metal shovels (or anything with a sharp blade) can scratch the surface of your pavement, so make sure to use a plastic shovel or a snowblower.
Once this is done, decide on your de-icer of choice. You can even opt for a homemade de-icer if you don’t want to break the bank:
Although it sounds funny, beet juice is an environmentally friendly alternative to a commonly used rock salt, and won’t harm your garden or grass.
Both sand and coffee grinds (not used at the same time) absorb sunlight, which helps snow and ice to melt. Especially mixing de-icer with sand, it’s a great way to not only remove ice, but to also lessen your chances of falling over.
As with most DIY cleaning solutions, vinegar is a great cupboard staple to use. Containing citric acid, vinegar helps to melt snow and ice, although you may have to apply it a few times to work.
Salt is the cheapest and most common way to get rid of ice due to its 99% sodium chloride that lowers the freezing point of water. You can help speed up the process by pouring hot water over the ice while you’re spreading the salt.
Rock salt is the most common salt to use, however you can also use table salt if you don’t have some. Table salt can be more effective due to the finer grinds. It has more surface area that will come in contact with the ice.
However, whilst it will de-ice paths and patios, high chloride levels in salt can be dangerous to wildlife, making the above options more environmentally friendly and safe.
Similar to your patio and paths, you’ll want to remove grime and debris from your decking before the cold weather starts. To prioritise decking safety, make sure to sweep away any fallen leaves to minimise residue on your decking.
Hopefully the snow season hasn’t begun yet, but if you notice some light snow dustings, then use a broom to simply brush it away. Avoid metal shovels to prevent damage.
Now it’s time to de-ice, avoid anything too harsh, as this could damage the wood and strip away finishes. Simply pour boiling water over ice to loosen it and then sweep it off. This method works best for small patches of ice as larger areas are likely to refreeze before it can be cleared.
Avoid using rock salt or anything with sodium chloride in it, as this can be corrosive to decking and leave the surface damaged.
Using a de-icer that’s gentle on decking is a great idea and magnesium chloride works great in colder temperatures. Spread evenly across the deck once you’ve tested a small area to make sure it’s compatible with your deck. This should help melt any ice without causing damage.
This method is especially beneficial for those with pets, as these de-icers are designed to be less toxic. The de-icers are gentler on decking, whilst still getting the job done.
This at home method requires 1 part rubbing alcohol with 2 parts water in a spray bottle. Simply spray the solution on the icy parts of your decking to lower the freezing point of water, which will melt the ice.
Some plants, such as Holly and Hawthorn, don’t get phased by the weather, but other plants like Petunias, Snapdragons and many fruits and vegetables struggle with the cold and frost. To keep these plants in the best condition possible, these tips should help you winter proof them.
If temperatures go below 10°C, it’s recommended to move plants such as Dahlias, Evergreen and Gladioli to a warmer, more sheltered part of the garden or into a greenhouse or a cool, lightroom to prevent them from dying with the first sign of frost.
Many plants will benefit from having mulch placed over their roots during winter, to add an extra layer of insulation. Apply a 2-4 inch layer of either garden compost, wood chippings or leaves to the base of the plant. Avoid piling mulch directly on the stems and trunks of the plant to avoid rotting.
Mulching is also beneficial for allowing rain to penetrate the soil in the winter whilst also improving the uptake of nutrients.
With cold weather expected, you may want to add a few layers to exposed plants to keep them warm. Use materials such as horticulture fleeces, straw, old sheets or polystyrene during the winter and then remove the cover once the weather warms up. Make sure to use breathable materials to avoid trapping moisture, as this can lead to mould.
Secure the covers with rocks or stakes to ensure your covers don’t blow away!
Although it’s important not to overwater, make sure you don’t forget to thoroughly water your plants before and during cold weather spells. This is largely due to moist soil retaining heat better than dry soil, which can help protect plant roots from freezing temperatures.
Pruning is great for reducing the risk of damage to plants by removing weak or dead branches that could break under snow. Start by trimming diseased or dead branches from trees, but make sure you leave some foliage intact to protect the plant from frost.
Avoid heavy pruning in late fall as it can stimulate new growth that’s vulnerable to cold.
If you’ve got pets, you may want to check out which garden plants are dangerous if ingested. Although beautiful, avoid Lilies, Daffodils and Tulips and switch to colourful but pet-safe plants such as Sunflowers, Marigolds and Rosemary.
Having a fresh source of water that is easily accessible can help keep your pets hydrated and cool throughout the day. Consider a fountain or pond and make sure the water is not too deep and easy to reach for your pet.
Regularly clean the water to prevent algae growth and stagnant water which may be off putting to your pet.
Install secure fencing that is high enough to stop pets from jumping over it, as inadequate fencing can lead to your furry friends wandering out of the garden and putting them at a safety risk. For cats, consider adding netting to prevent them escaping and for dogs, get fences that are deep enough to stop them digging underneath as well as leaping over it.
Although mulching does wonders for plants, some types can also be toxic to pets. Use cedar, pine bark or straw, which are much safer options that mulch like cocoa.
Just like mulch, some pesticides, herbicides and fertilisers can be harmful if ingested by pets. To avoid this, use organic and pet-friendly garden products wherever you can like compost or vinegar-based weed killers.
If you don’t have the above, you may want to consider pet-friendly fencing around the garden beds. Not only will this keep them from any toxic chemicals, but it will also prevent them from digging in your garden beds and ruining your gorgeous plants.
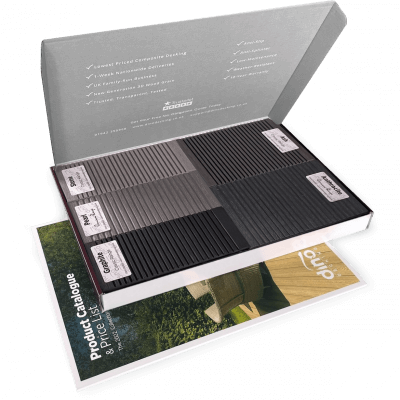
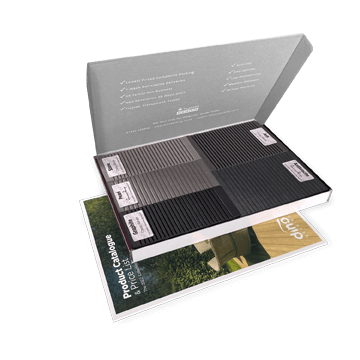
Our sample pack contains a sample piece of each colour currently available. Order your free sample pack today to compare the colours and get a true feeling of the Dino Decking range!
Our composite decking looks great in any setting, but you can really make your outdoor spaces shine with our decking
If the idea of having rats under your decking makes you shiver, don’t worry. We’ll let you know the signs
Business hours
Monday: 09:00 – 17:30
Tuesday: 09:00 – 17:30
Wednesday: 09:00 – 17:30
Thursday: 09:00 – 17:30
Friday: 09:00 – 17:30
Saturday: Closed
Sunday: Closed
Contact us
01942 355968
support@dino.co.uk
Collection Address: Unit 1 Wetheral Close Hindley Ind Estate Wigan Greater Manchester North West WN2 4HS
Pages
Products
Testing
Copyright 2025 Dino Decking Ltd All Rights Reserved.
VAT Number: GB296097848.
Company Number: 10837233.